VChat is a powerful and innovative chat plugin designed to enhance the communication experience on WordPress websites. With Viber chat support, your website visitors can quickly reach you for support. The Viber chat plugin includes 7+ different layouts, 13+ different animations, a call-to-action button, compatibility with Elementor, and a shortcode. There are also many types of call-to-action buttons on Viber. If you are interested in creating an elegant and engaging Viber chat bubble on your WordPress website, this blog is for you.
In this blog, I’ll show you every step of how to create an outstanding Viber chat bubble and call to action button in WordPress. So, please keep reading.
Table of Contents
Install and activate the Viber chat support plugin
Let’s install Viber Chat.
To install and activate the Viber chat support plugin on your WordPress website, follow these general steps:
- Log in to your WordPress dashboard.
- From the left-hand menu, click on “Plugins” and then select “Add New.”
- In the search box on the top right corner, type “Viber chat support” and hit the “Enter” key or click the search icon.
- You should see a list of plugins related to Viber chat support. You just need to install Viber chat support by: ThemeAtelier.
- Click the “Install Now” button next to the Viber chat support plugin you’ve chosen.
- Once the installation is complete, click the “Activate” button to activate the plugin.
If you need further guidance to install and activate Viber chat, please refer to this tutorial.
Configure the Viber chat bubble
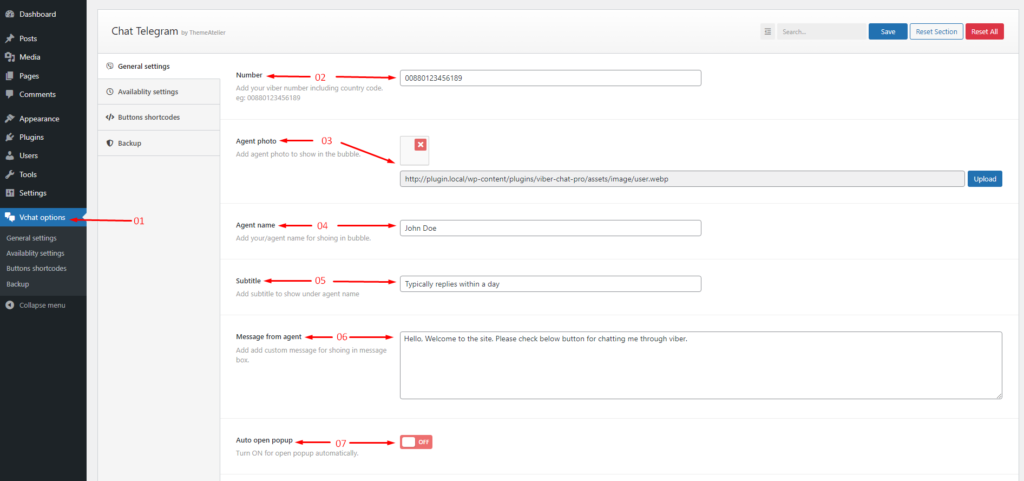
After activation, you will see the Vchat options menu in your WordPress dashboard sidebar. If you click on that menu you will see all the easy to manageable options we provided.
General Settings 01

- First, click the Vchat options
- Must be added to your Viber number including country code.
- Add your photo to show in the bubble.
- Add your name for showing in the bubble.
- Add your subtitle show under the name
- Add a custom message for shoing in the message box.
- Turn ON for open popup automatically.
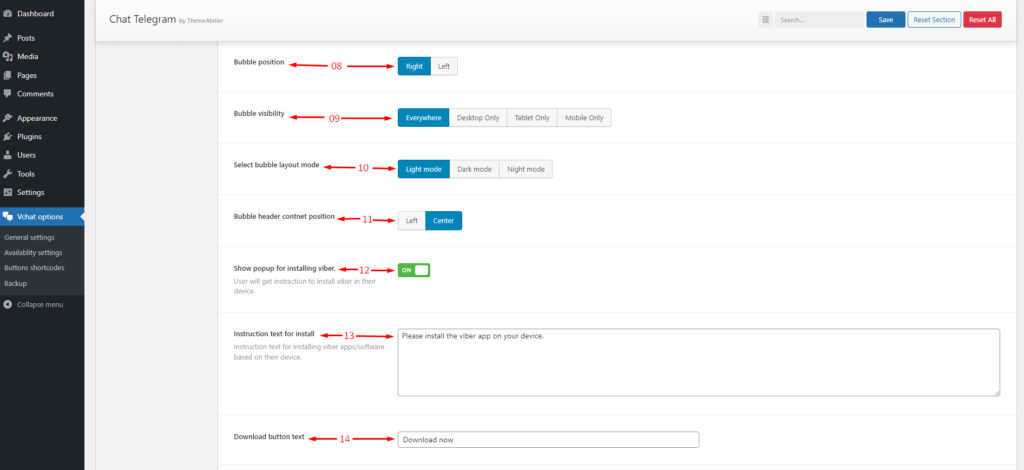
General Settings 02

- Select Bubble position on your favorite site
- Select Bubble visibility
- There are 3 free bubble layouts, you can select any of the 3 bubble layouts.
- You can change the Bubble header content position
- Show popup for installing Viber.
- Instruction text for installing Viber apps/software based on their device.
- You can change the text of the button for downloading Viber if you want
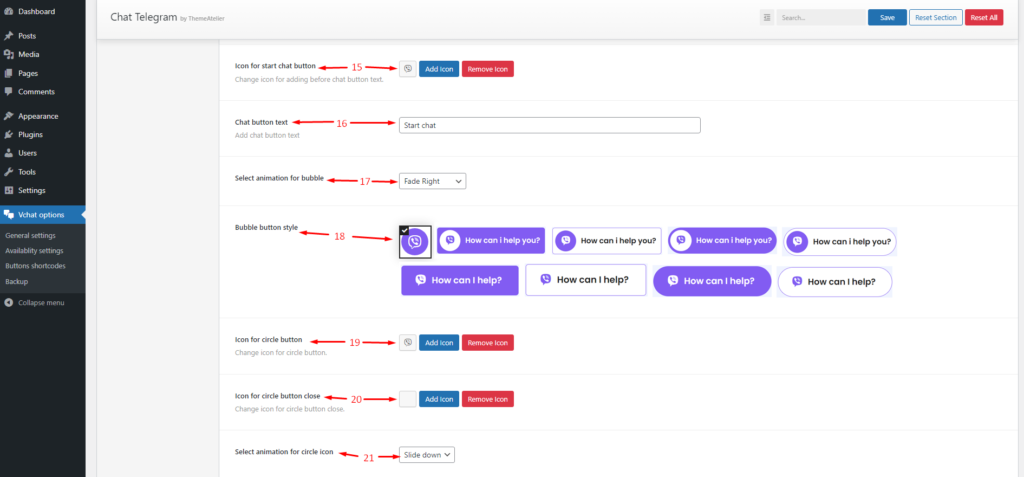
General Settings 03

- You can change the icon for adding before the chat button text.
- You can change the text of the button to start the chat if you want.
- Here are many bubble animations you can use whichever animation you want.
- Here are many button styles you can select from any one of your favorites.
- Change the icon for the circle button.
- Change the icon for the circle button close.
- Here are 4 button icon animations you can select from any one.
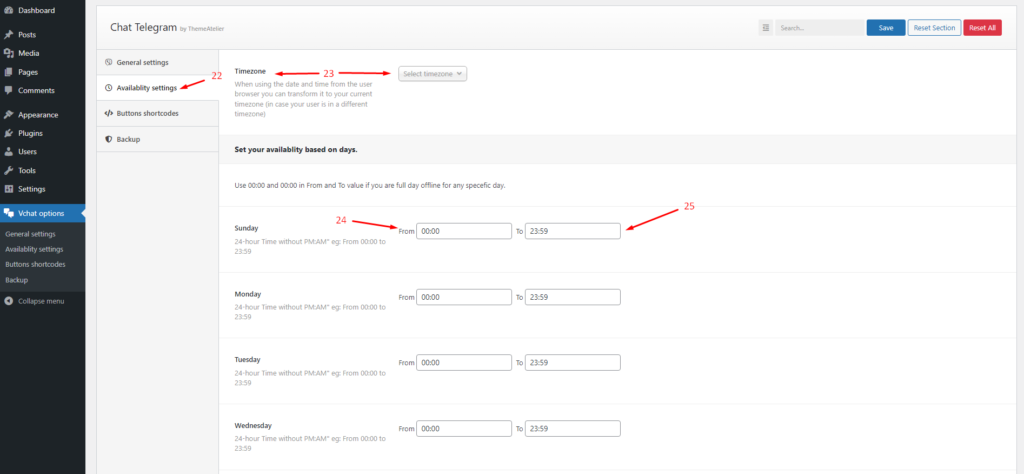
Availability settings

- Select availability settings on the sidebar.
- When using the date and time from the user browser you can transform it to your current timezone (in case your user is in a different timezone).
- Set your Availability start time as soon as possible to support your client.
- Set your Availability end time to support your client.
Conclusion
Overall, the Viber chat plugin is a useful tool for website owners looking to improve customer engagement and for users looking for a convenient way to make Viber chat. With its customizable options and easy-to-use interface, the plugin is a great addition to any website or web application that requires VChat functionality.


Thank you for your sharing. I am worried that I lack creative ideas. It is your article that makes me full of hope. Thank you. But, I have a question, can you help me?